Post by plunc on Jan 26, 2014 6:17:18 GMT -6
Been pouring jig heads for a few years, and after repeated requests, caved to the pressure for painted heads. With some input from those more '' in the know'' about it then me(thanks steve  , but the eyes are still never going to happen!), I decided to try the powder-paint/ fluid-bed route. A bit of tinkering and swearing, & I was able to come up with a good-working, very cheap, easy set-up. Maybe someone here will find it helpful, sometime.
Materials to make a single bed:
(1) 1.75'' long piece of 2''diam. PVC pipe(schedule 40)
(1) 2'' long piece of 2''diam. PVC pipe
(1) 3'' long piece of 2''diam. PVC pipe
(2) 2'' couplers(.78ea.)
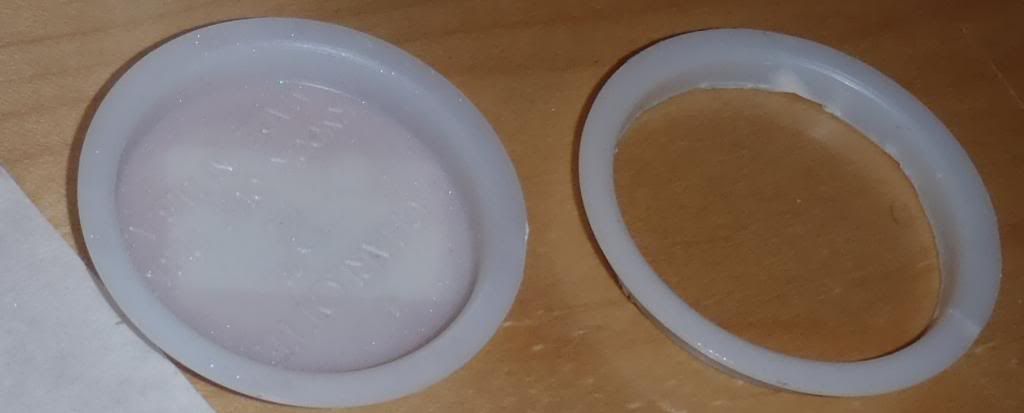
(2) 2''diam. test caps(.66ea.)
(1) aquarium line air-vave(4.99/8)
(1) coffee filter
(5' of PVC was <3$)

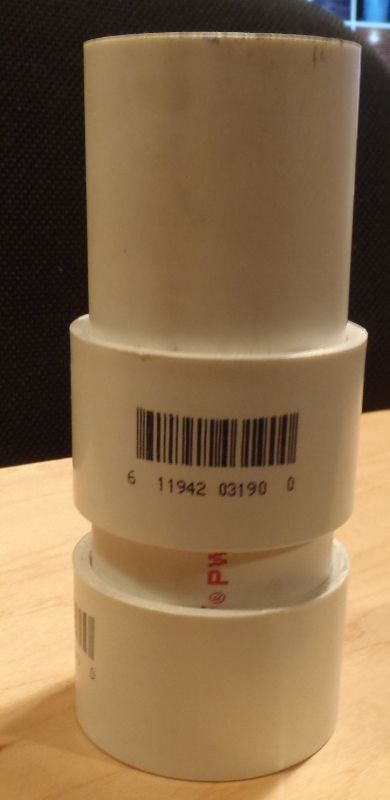
-connect the 2 couplers via 2'' long PVC pipe. Before putting what is going to be the lower coupler on, put test cap in coupler. Fits perfect, but not snug. Put pvc pipe in coupler (after test cap) and push in until test cap & bottom of pipe are tight to the lip inside the coupler. This will form an airtight seal.

-Next, take the other test cap, and cut out the center. I used an exacto knife and only cut myself once in 6 caps that I cut(this is a good thing...)

-take coffee filter, 3"PVC pipe, and carved out test cap, place the coffee filter over end of pipe(helps to have smooth, clean edges on pipe and cap, use sandpaper if its rough or uneven), -take the hollowed test cap and put it on top of coffee filter, fit it snug inside of pipe end. Trim off excess coffee filter.

-place filtered end of pipe into end of coupler that does NOT contain the test cap.

-drill hole in PVC pipe connecting the 2 couplers. Insert air-valve into drilled hole (for drilling, I got best results by starting with tiny bit, and increasing the bit-size incrementally. Made or a cleaner edge and better seal when you force-fit the valve-spout in)

The bed is complete. Get a length of air-hose tubing(medical, aquarium, whatever) and connect to an aquarium-style air-pump(I had a few laying around from yrs ago, but Im sure a new 1 can be had for 15$), dump your powder paint in the top, turn on the pump and adjust valve to produce liquid-like movement without individual spouts or geysers.
I have been rather impressed at how much nicer the finished jig turns out vs dipping in a jar of powder. Much cleaner and less clumpy-looking.
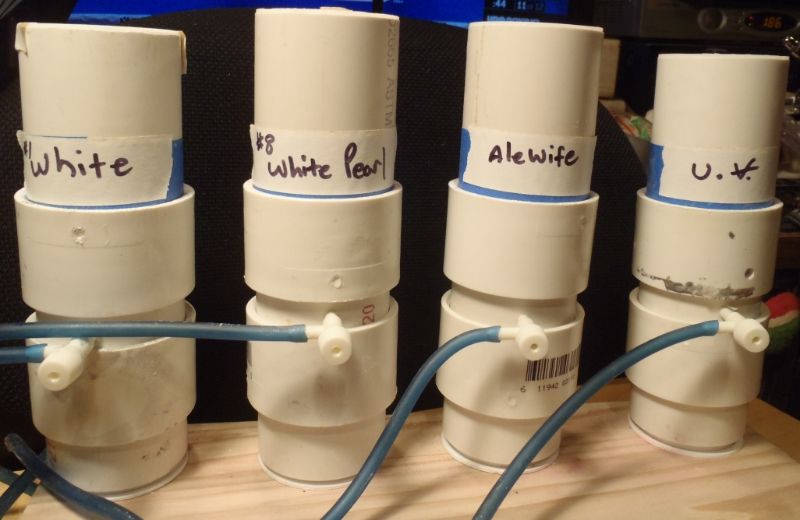
You may be wondering "what is the leftover 1.75" leftover PVC for?". In being consistent with myself and making things more complicated than they need to be, I decided to make a 4-bed unit mounted on a piece of 2"x 6". Screwed down (4)-2" PVC snap drains(2.08$ea.) onto a board

and the 1.75" pipe piece acts as a mounting post between snap-drain and bottom coupler on bed.

Add an aquarium 1 into 4 "gang-valve" in (5$?) and with a larger pump you can run 4 beds at once.

Makes multi-color jigs, and u.v. coating a bit easier with 3-4 powder beds going at once. Can prime, paint and seal a 2 color jig in about 15 seconds with this set-up.
*tip-buy extra test caps, and use them to cap your filter tubes with the powder, instead of transferring it back to jar. Makes changing colors on the air beds possible in a couple seconds.
some my first attempts:

P.S. I am open to any color suggestions...
 , but the eyes are still never going to happen!), I decided to try the powder-paint/ fluid-bed route. A bit of tinkering and swearing, & I was able to come up with a good-working, very cheap, easy set-up. Maybe someone here will find it helpful, sometime.
Materials to make a single bed:
(1) 1.75'' long piece of 2''diam. PVC pipe(schedule 40)
(1) 2'' long piece of 2''diam. PVC pipe
(1) 3'' long piece of 2''diam. PVC pipe
(2) 2'' couplers(.78ea.)
(2) 2''diam. test caps(.66ea.)
(1) aquarium line air-vave(4.99/8)
(1) coffee filter
(5' of PVC was <3$)

-connect the 2 couplers via 2'' long PVC pipe. Before putting what is going to be the lower coupler on, put test cap in coupler. Fits perfect, but not snug. Put pvc pipe in coupler (after test cap) and push in until test cap & bottom of pipe are tight to the lip inside the coupler. This will form an airtight seal.

-Next, take the other test cap, and cut out the center. I used an exacto knife and only cut myself once in 6 caps that I cut(this is a good thing...)

-take coffee filter, 3"PVC pipe, and carved out test cap, place the coffee filter over end of pipe(helps to have smooth, clean edges on pipe and cap, use sandpaper if its rough or uneven), -take the hollowed test cap and put it on top of coffee filter, fit it snug inside of pipe end. Trim off excess coffee filter.

-place filtered end of pipe into end of coupler that does NOT contain the test cap.

-drill hole in PVC pipe connecting the 2 couplers. Insert air-valve into drilled hole (for drilling, I got best results by starting with tiny bit, and increasing the bit-size incrementally. Made or a cleaner edge and better seal when you force-fit the valve-spout in)

The bed is complete. Get a length of air-hose tubing(medical, aquarium, whatever) and connect to an aquarium-style air-pump(I had a few laying around from yrs ago, but Im sure a new 1 can be had for 15$), dump your powder paint in the top, turn on the pump and adjust valve to produce liquid-like movement without individual spouts or geysers.
I have been rather impressed at how much nicer the finished jig turns out vs dipping in a jar of powder. Much cleaner and less clumpy-looking.
You may be wondering "what is the leftover 1.75" leftover PVC for?". In being consistent with myself and making things more complicated than they need to be, I decided to make a 4-bed unit mounted on a piece of 2"x 6". Screwed down (4)-2" PVC snap drains(2.08$ea.) onto a board

and the 1.75" pipe piece acts as a mounting post between snap-drain and bottom coupler on bed.

Add an aquarium 1 into 4 "gang-valve" in (5$?) and with a larger pump you can run 4 beds at once.

Makes multi-color jigs, and u.v. coating a bit easier with 3-4 powder beds going at once. Can prime, paint and seal a 2 color jig in about 15 seconds with this set-up.
*tip-buy extra test caps, and use them to cap your filter tubes with the powder, instead of transferring it back to jar. Makes changing colors on the air beds possible in a couple seconds.
some my first attempts:

P.S. I am open to any color suggestions...


 Got one. Works great!! Thanks for the post!
